Gaming and movies on the cloud
How to set up a cloud instance and use it as a remote environment for movies and games.
Hey folks, with the world keeping apart I thought it would be a good idea to make a small post on how to setup a remote desktop accessible from anywhere in the world, alone or together. The costs for this tutorial range from $.70/h to $1.2/h for a gaming & ML server with a GPU (half this if you use preemptible / spot instances), but I would highly suggest using free credits.
Advantages of cloud remote
How do I get started?
Download on your local machine Parsec and make an account. Parsec will be used as the hub for your distant machines. I have tried different solutions and Parsec gave me by far the fastest and smoothest experience (I'm not affiliated in any way to the company btw, but if they want to send over a t-shirt, I'll let them).
You will also need an account in a cloud provider, with the appropriate quotas for GCP. If you already have one you can skip this.
| AWS | GCP |
|---|
Go here to create your GCP account. GCP gives you $300 of free credit as a new user, but AWS gives you a free Windows Server license so it's a trade-off. Additionally, AWS instructions require minimal use of the terminal and might be easier for some users. In either case, you will need to add a credit card to the account.
| Windows | Mac | Linux |
|---|
Open your terminal (available in the Launchpad > Utilities > Terminal)
You will need brew and brew cask to run the following instructions. You can install them with the below. Alternatively you can just follow the manual instructions here.
/bin/bash -c "$(curl -fsSL https://raw.githubusercontent.com/Homebrew/install/master/install.sh)"Run the following to install the gcloud CLI.
brew cask install google-cloud-sdkYou will need to initialize the gcloud CLI and activate the GCE API with the following commands.
gcloud init
gcloud services enable compute.googleapis.com
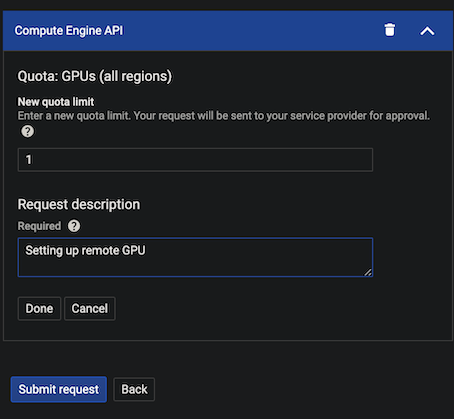
GCP requires you to request an increase in quotas before using GPUs. To do so click here to access the quotas page, or search for "quotas" in the search bar, and select "All Quotas". Click on the dropdown "All metrics", and deselect all. Select "GPUs (all regions)", and edit the quota, setting it to 1, before submitting the request. The request should be fulfilled almost instantly.
Start a server with the following command. I recommend using a n1-standard-4 which cost around $.70/h for most games / movies, or a n1-standard-8 for $1.2/h in case of particularly demanding tasks. The below command uses a T4 GPU, but you can also go for a P4. Choose the region that is the closest to you, and make sure that they have T4 GPUs available. You can use the following command to see the availability of GPUs.
gcloud compute accelerator-types listSometime regions run out of available GPUs, in which case you can just try a different one.
Launch your instance with the following command (adjust the zone, machine-type and boot-disk-size as needed).
gcloud compute instances create remote-gpu \
        --machine-type n1-standard-8 \
        --accelerator type=nvidia-tesla-p4-vws,count=1 \
        --image-project windows-cloud \
        --image-family windows-2019 \
        --boot-disk-size 200 \
        --zone us-west2-b \
        --maintenance-policy "TERMINATE"
If everything went well, you should be able to see in the terminal your remote IP, and your server running on the Compute Engine > VM instances tab in the GCP console.
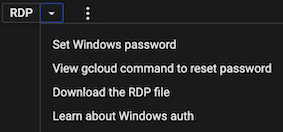
Head to the console, and first set up a new Windows password, and make a note of it. 
Click on "RDP" to connect to your server (you will need to install a chrome extension).
Once you are connected, launch the Google Cloud SDK Shell. 
Launch a powershell by typing... Well... "powershell".
The following should set up everything you need (h/t to the parsec team who made that repo. I also recommend inputting it line by line.).
[Net.ServicePointManager]::SecurityProtocol = "tls12, tls11, tls"
(New-Object System.Net.WebClient).DownloadFile("https://github.com/jamesstringerparsec/Parsec-Cloud-Preparation-Tool/archive/master.zip","$ENV:UserProfile\Downloads\Parsec-Cloud-Preparation-Tool.zip")
New-Item -Path $ENV:UserProfile\Downloads\Parsec-Cloud-Preparation-Tool -ItemType Directory
Expand-Archive $ENV:UserProfile\Downloads\Parsec-Cloud-Preparation-Tool.Zip -DestinationPath $ENV:UserProfile\Downloads\Parsec-Cloud-Preparation-Tool
CD $ENV:UserProfile\Downloads\Parsec-Cloud-Preparation-Tool\Parsec-Cloud-Preparation-Tool-master\
Powershell.exe -File $ENV:UserProfile\Downloads\Parsec-Cloud-Preparation-Tool\Parsec-Cloud-Preparation-Tool-master\Loader.ps1
As you follow the instructions, a reboot may be required.
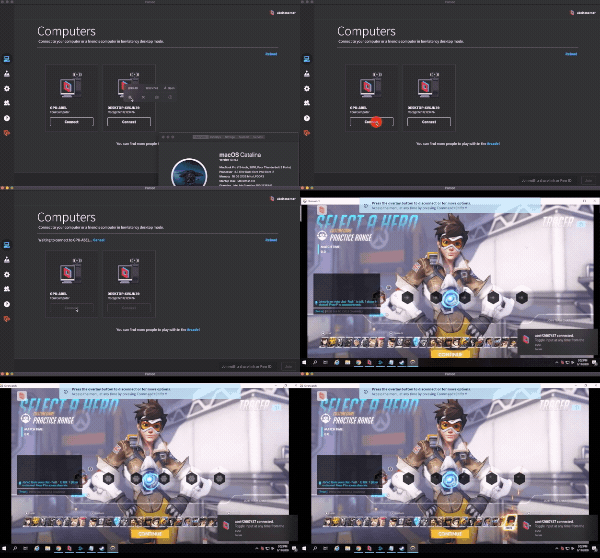
Log into parsec and start sharing your remote server. On your local laptop / desktop, launch Parsec, and your machine should appear, ready to go. Connect to it in parsec, and exit the RDP program.
Don't forget to shut down your instance when you're not using it, otherwise you will be billed for it. You're ready to game your sorrows away, alone, or together!
